29 Dec 2025
- 0 Comments
Getting sharp, detailed images of Jupiter, Saturn, or Mars isn’t about having the most expensive telescope. It’s about getting the right settings on your camera-FPS, gain, and ROI-and knowing how they work together. Too many amateur astrophotographers waste hours capturing blurry, noisy video, then wonder why their final stacked image looks like a watercolor painting. Here’s how to fix that.
Why Planetary Imaging Needs Video, Not Still Photos
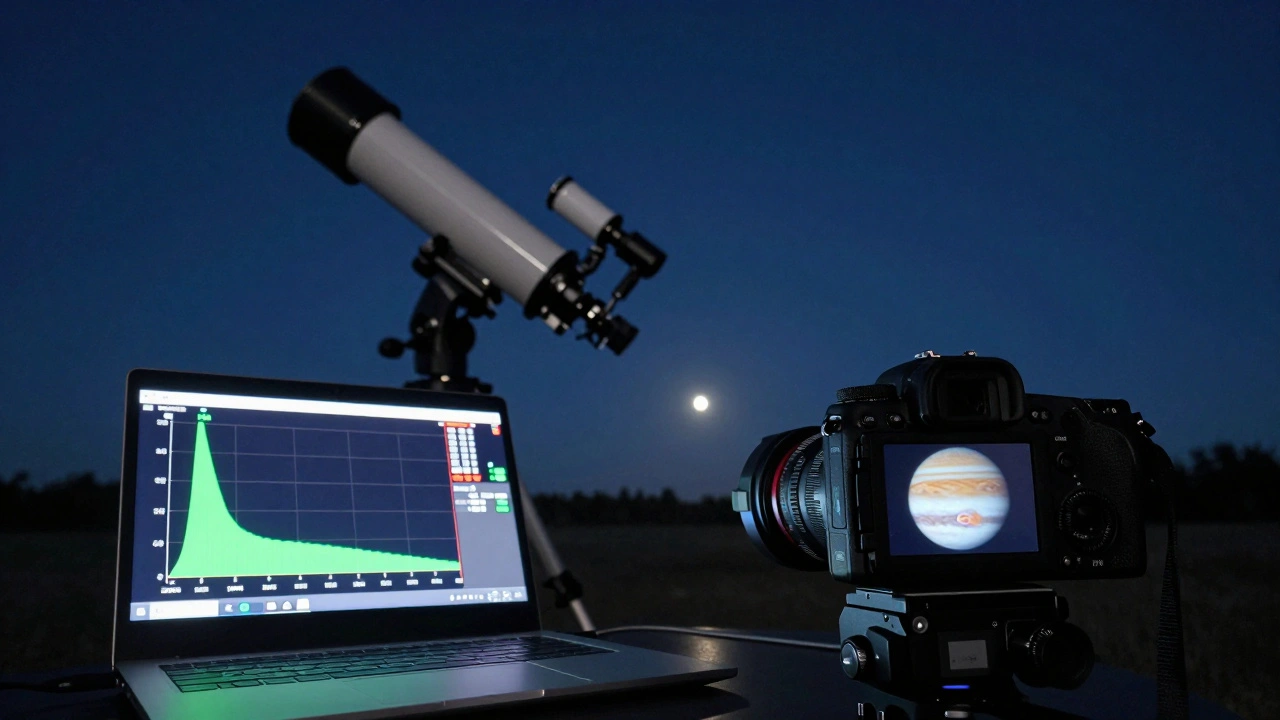
Unlike deep-sky objects like galaxies or nebulae, planets are bright and small. They move fast across your field of view, and atmospheric turbulence blurs them in real time. That’s why you don’t take one photo. You record a video-usually 30 seconds to 5 minutes long-capturing hundreds or thousands of frames. Later, you stack the best ones using software like AutoStakkert! or RegiStax. The goal? Pull out the clearest moments when the air was steady.But if your camera settings are off, even 10,000 frames won’t help. You need to control three things: frame rate (FPS), gain, and region of interest (ROI).
Frame Rate (FPS): Faster Isn’t Always Better
FPS stands for frames per second. Higher FPS means more frames captured in the same time. That sounds good, right? But there’s a catch.Each frame needs time to collect light. If you push FPS too high, each frame gets less exposure time. That means dimmer frames, more noise, and less detail. For planets, you want the sweet spot: enough frames to catch good seeing moments, but not so many that the image gets too dark.
For Jupiter and Saturn, aim for 30-60 FPS. Mars, being smaller and dimmer, often needs 20-40 FPS. Uranus and Neptune? Stick to 10-20 FPS. If you’re using a color camera like the ZWO ASI224MC, you can go as high as 100 FPS on Jupiter-but only if your telescope has a fast focal ratio (f/6 or faster) and your sky isn’t too light-polluted.
Test this: Record two 60-second clips of Jupiter-one at 30 FPS, one at 90 FPS. Stack both. The 30 FPS version will likely show more texture in the cloud belts. Why? Because each frame had more light. More light = cleaner signal.
Gain: The Noise Balancing Act
Gain is like the volume knob on your camera’s sensor. Turn it up, and the image gets brighter. But turn it too high, and you amplify noise-grainy, speckled messes that ruin detail.Most planetary cameras have a “unity gain” setting. That’s the point where one electron equals one digital number (DN). For many ZWO cameras, unity gain is around 200-250. But you don’t want unity gain for planets. You want a little higher-enough to lift the signal above read noise, but not so high that you drown in shot noise.
For most setups:
- Jupiter: 150-220 gain
- Saturn: 180-250 gain
- Mars: 220-300 gain
Why does Mars need more gain? Because it’s smaller and reflects less light. You’re fighting lower signal, so you need to boost it. But if you go above 300 on a 12-bit camera, you’ll start clipping highlights and losing detail in the polar caps.
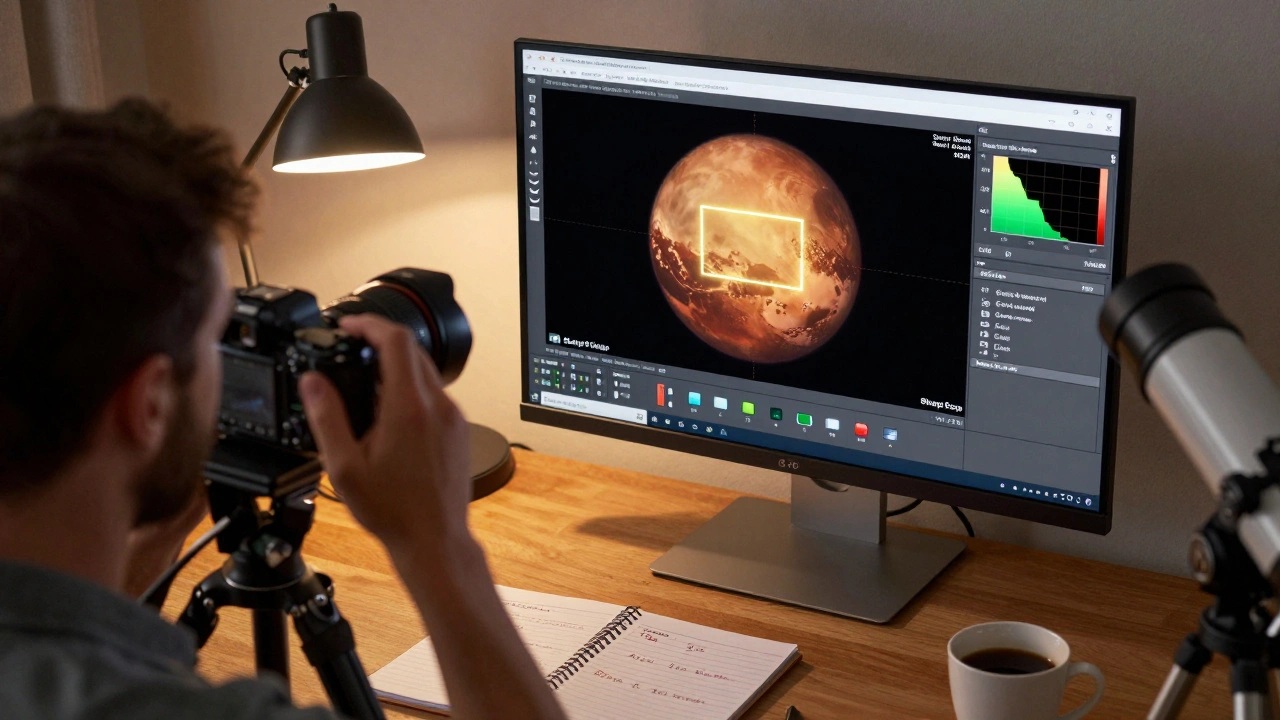
Pro tip: Use the histogram on your capture software. Aim for the peak to sit just left of center. If it’s too far left, your image is underexposed. Too far right? You’re burning out the bright zones on Jupiter’s cloud tops.
Region of Interest (ROI): Crop to Win
Your camera sensor is probably 1920x1080 or larger. But you don’t need all that. Planets are tiny-often less than 50 pixels across in your final image. Capturing the whole sensor wastes bandwidth, slows your frame rate, and fills your disk with useless data.That’s where ROI comes in. Region of Interest lets you crop the sensor down to just the area around the planet. This does three things:
- Reduces file size-easier to store and process
- Increases FPS-less data to read per frame
- Improves focus-your software can track the planet better
For example: If you’re imaging Jupiter at 400x magnification, you might only need a 400x400 pixel area centered on the planet. Set your ROI to that size. Most capture software (SharpCap, FireCapture) lets you drag a box on the live view to define it.
Here’s a quick guide:
- Jupiter: 300-500 pixel ROI
- Saturn: 250-400 pixel ROI
- Mars: 200-350 pixel ROI (especially during opposition)
Don’t go smaller than 200 pixels unless you’re using a very long focal length (2000mm+). Too tight an ROI makes it hard to keep the planet centered, especially if your mount isn’t perfect.
Putting It All Together: A Real-World Setup
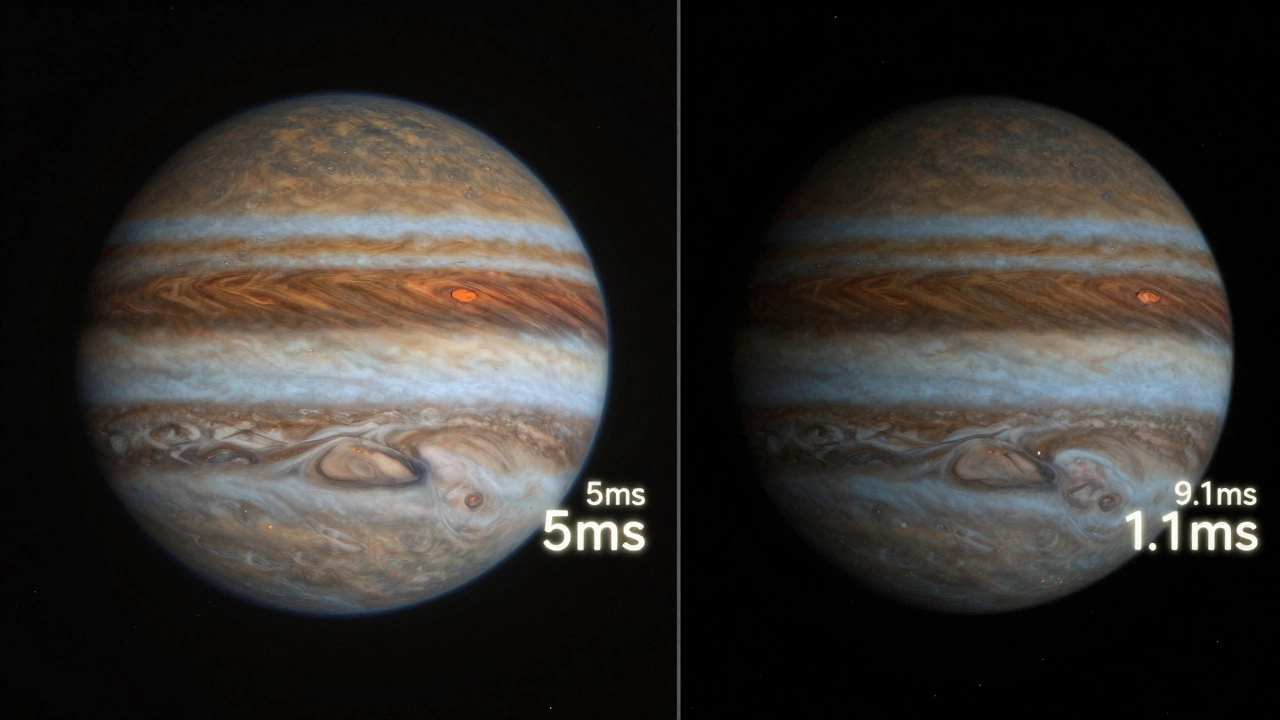
Let’s say you’re imaging Jupiter on a clear night with a Celestron C8 (2000mm focal length) and a ZWO ASI462MC camera. Here’s what you’d set:- FPS: 45
- Gain: 180
- ROI: 400x400 pixels centered on Jupiter
- Exposure: 5-7 ms (auto-calculated based on FPS and gain)
- Recording time: 90 seconds
You’ll get around 4,000 frames. After stacking, you’ll see the Great Red Spot clearly, with fine banding in the cloud layers. No noise. No blur. Just crisp detail.
Now try this: Change only the gain to 300. You’ll see the image gets brighter-but the cloud belts turn grainy. The contrast drops. That’s the noise creeping in.
Change the FPS to 100. Now your exposure drops to 3 ms. The image gets darker. You lose texture. You might get more frames, but they’re useless.
Change the ROI to 100x100. Now your camera struggles to keep Jupiter in frame. Every tiny vibration shakes it out of the box. You end up with a video full of missing frames.
That’s why balance matters.
Common Mistakes and How to Avoid Them
- Mistake: Using maximum gain because “brighter is better.” Solution: Use the histogram. Keep the peak just left of center.
- Mistake: Recording 10-minute videos hoping for “more data.” Solution: 2-3 minutes is enough. Beyond that, atmospheric conditions change too much.
- Mistake: Ignoring ROI and capturing the whole sensor. Solution: Crop early. It’s faster, cleaner, and gives better FPS.
- Mistake: Trying to image Mars at 100 FPS. Solution: Mars is dim. Lower FPS, higher gain, longer exposure.
Tools That Help
You don’t need fancy gear to get this right. Here are free or low-cost tools that make planning easier:- SharpCap: Shows real-time histogram, lets you set ROI with a drag-and-drop box.
- FireCapture: Great for automated capture and has built-in FPS/gain calculators.
- Planetary Imaging Pre-Processor (online tool): Input your scope, camera, and target-it suggests optimal settings.
- Stellarium: Use it to check when your target is highest in the sky. Better seeing = better results.
Final Tip: Test, Don’t Guess
Every setup is different. Your telescope, your camera, your sky-all affect the ideal settings. Don’t just copy someone else’s numbers. Do this:- On a clear night, pick one planet.
- Record five 60-second clips with different settings: one low FPS/high gain, one high FPS/low gain, one with ROI, one without, one at unity gain.
- Stack them all.
- Compare side-by-side. Which one has the most detail? The least noise?
You’ll learn more from that 5-minute test than from reading ten blog posts.
What FPS should I use for Mars?
For Mars, aim for 20-40 FPS. Mars is smaller and reflects less light than Jupiter or Saturn, so you need longer exposure per frame. Going above 40 FPS often makes the image too dark, reducing detail in surface features like polar caps and dust storms.
Is higher gain always better for planetary imaging?
No. Higher gain makes the image brighter but also increases noise. For most planetary cameras, gain between 150 and 300 works best. Use your software’s histogram to avoid clipping highlights. If the peak is too far right, you’re losing detail in bright areas like Jupiter’s cloud tops.
Why use ROI instead of the full sensor?
Using ROI reduces the amount of data your camera has to process per frame. This lets you run higher FPS without overloading your USB connection or hard drive. It also improves focus stability and makes stacking software work faster and more accurately by focusing only on the planet.
Can I use a smartphone to capture planetary video?
It’s possible, but not ideal. Smartphones have tiny sensors and fixed lenses. You’ll struggle to get enough magnification and control over exposure or gain. Dedicated planetary cameras (like ZWO or QHY models) give you manual control, higher frame rates, and better sensitivity-making them far more effective for serious planetary imaging.
How long should I record planetary video?
Record between 1 and 3 minutes. Longer videos don’t improve quality-they just include more bad frames from changing atmospheric conditions. The best results come from capturing the peak moments of steady seeing, which rarely last more than a few minutes.
Do I need a tracking mount for planetary imaging?
You don’t need a motorized equatorial mount. Most planetary imagers use alt-azimuth mounts or even simple Dobsonians. Since you’re capturing video and stacking frames, slight drift doesn’t matter. Just make sure your setup is stable and your focus is locked in before recording.