4 Mar 2026
- 0 Comments
Planning your first simulated observation session might sound like overkill if you’re just starting out. But if you’ve ever stared up at the night sky, squinted at a star chart, and wondered where to even begin, you’re already on the right path. Simulated observation isn’t about replacing real stargazing-it’s about preparing for it. And when you do step outside with your telescope, you’ll know exactly what you’re looking for, why it matters, and how to find it without fumbling in the dark.
What Is a Simulated Observation Session?
A simulated observation session is a dry run of your actual stargazing. You use planetarium software-like Stellarium, SkySafari, or even free web tools like In-The-Sky.org-to preview what the sky will look like at a specific time and location. You don’t just see where the planets are. You check how high they’ll rise above the horizon, whether your backyard has a clear view, how bright they’ll appear, and even what eyepiece will give you the best view. It’s like rehearsing a play before opening night.
Most beginners skip this step because they think it’s unnecessary. But here’s the truth: if you’ve ever spent 20 minutes trying to find Jupiter only to realize it’s already set behind the trees, you know why simulation matters. Simulating your session cuts frustration, saves time, and turns confusion into confidence.
Step 1: Pick Your Target
Don’t try to see everything. Start with one object. Something bright. Something easy. Something that’ll make you say, “Wow.”
- Moon: Even in a small telescope, its craters and seas are stunning. Try the terminator-the line between light and dark-when shadows are longest.
- Jupiter: With even a basic 70mm scope, you’ll see its four largest moons. Sometimes, you’ll catch a stripe or two on the planet itself.
- Saturn: Its rings are unmistakable. You don’t need a big scope to see them. Just clear skies and patience.
- Orion Nebula: A fuzzy patch to the naked eye, but through a telescope, it becomes a glowing cloud of gas where stars are born.
Use your simulation tool to filter objects by brightness (magnitude). Anything below +4.0 is visible to the naked eye under decent skies. Stick to +2.0 or brighter for your first session.
Step 2: Set Your Time and Location
Simulation only works if it matches reality. Enter your exact location. If you’re in Portland, Oregon, type in your neighborhood-not just “Portland.” A few miles north or south can change how high an object rises. Use Google Maps to grab your latitude and longitude if you’re unsure.
Choose a date and time that matches your planned observing night. Don’t pick tonight’s sky if you’re planning to go out next week. The sky changes. Planets move. The Moon phases shift. Your simulation needs to reflect the real conditions.
Check the moon phase. A full moon will wash out fainter objects. If you’re aiming for deep-sky targets like galaxies or nebulae, avoid nights near full moon. New moon is ideal.
Step 3: Check the Sky Conditions
Simulation tools show you where objects are-but they don’t tell you if you’ll see them. That’s where real-world conditions come in.
- Cloud cover: Use a weather app like Windy or the Clear Sky Chart (clearskychart.com) to see cloud forecasts for your location.
- Light pollution: If you live in the city, your view of faint objects is limited. Simulation tools often have a light pollution filter. Turn it on. See how much dimmer your target appears. If it drops below magnitude +6.0, you’ll need binoculars or a darker site.
- Atmospheric seeing: This is how steady the air is. Poor seeing means stars twinkle violently and planets look blurry. Apps like Meteoblue or astronomy-specific forecasts give you seeing ratings. Aim for “good” or “excellent.”
Portland’s weather is famously cloudy. That’s okay. Simulating helps you pick the best windows. Even one clear night a month is worth planning for.
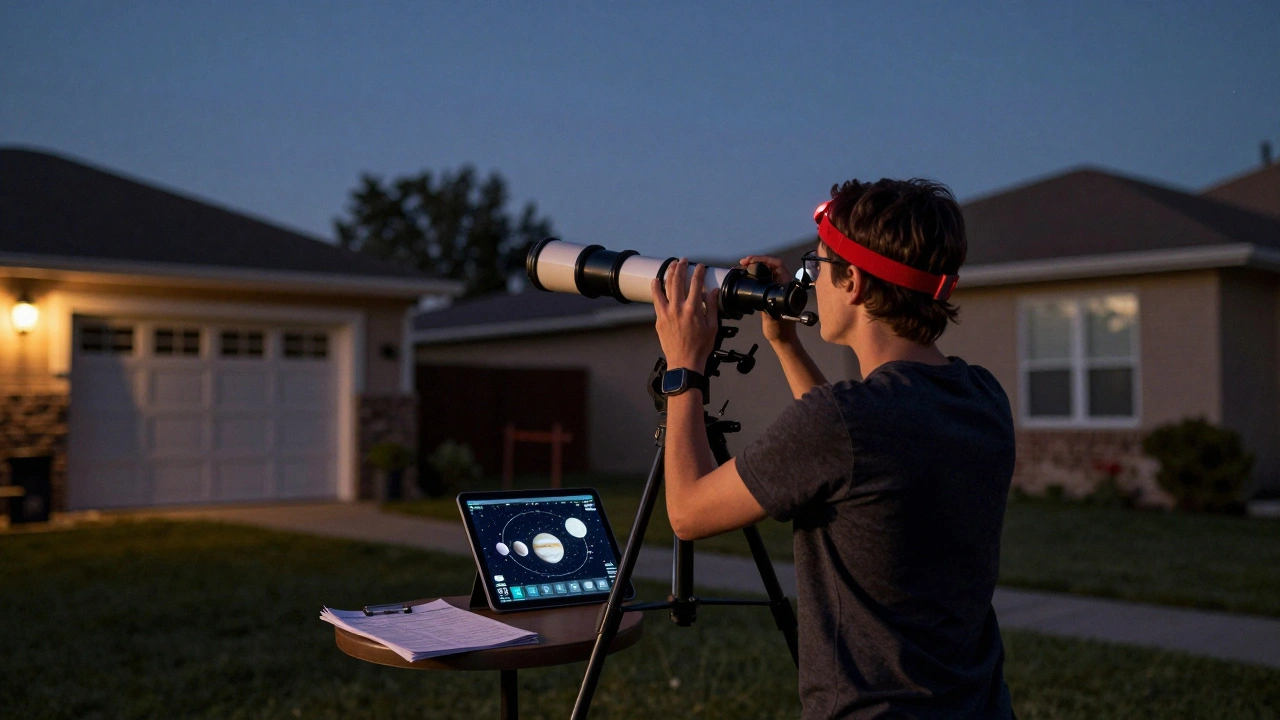
Step 4: Plan Your Equipment Setup
Here’s where many people fail: they bring the telescope, but forget the essentials.
- Find your eyepieces: Your simulation tool can tell you the magnification needed for your target. For Jupiter, 100x-150x works best. For the Orion Nebula, 40x-60x gives a wider, more impressive view. Match your eyepiece focal length to your telescope’s focal length to get there.
- Use a red light: Your eyes need 20 minutes to fully adapt to darkness. A white flashlight ruins that. Use a red LED headlamp or tape a red plastic cup over your phone screen.
- Bring a chair: You’ll be looking up for hours. A low stool or reclining chair keeps your neck from screaming.
- Check your battery: If your mount or finder scope runs on batteries, bring spares. Cold weather kills them fast.
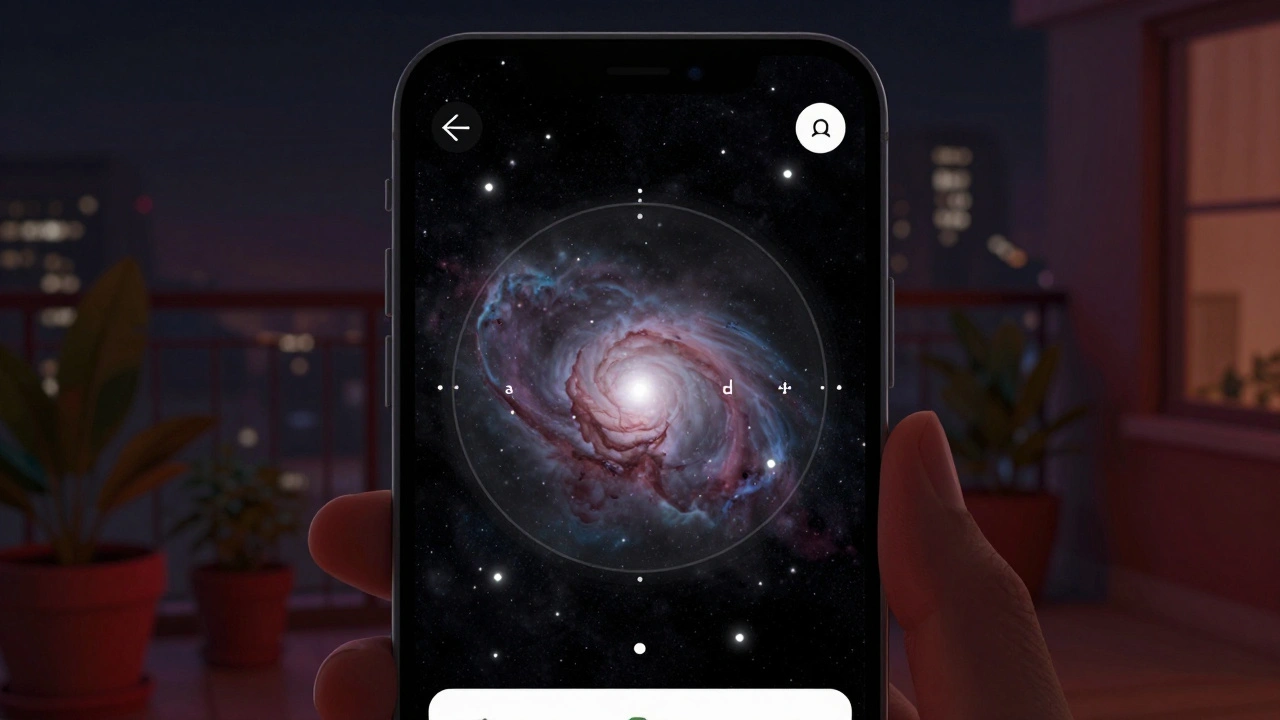
Step 5: Simulate the View
Now, open your planetarium app. Set your location, time, and date. Zoom in on your target. Watch how it moves across the sky. See where it rises, peaks, and sets.
Use the app’s “field of view” tool. If you have a 25mm eyepiece with a 50-degree apparent field, you can simulate what the sky will look like through your scope. You’ll see how much space is around your target. That helps you identify nearby stars as landmarks.
For example: If you’re hunting for the Orion Nebula, the app will show you it’s just below Orion’s belt. The three stars in a row? That’s your guide. Once you find them, you know where to look next. This is called star-hopping. Simulation turns it from guesswork into a map.
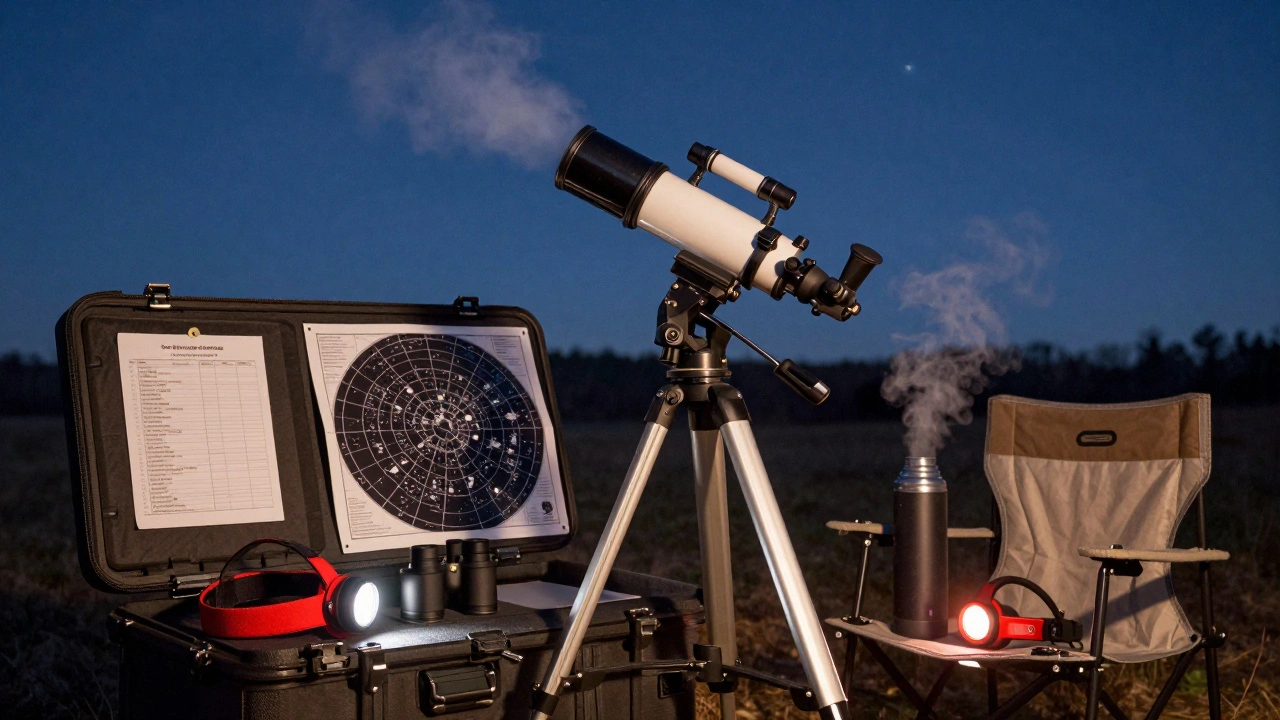
Step 6: Write a Quick Checklist
Don’t rely on memory. Write down what you’ll need:
- Telescope and mount
- 2 eyepieces (low and medium power)
- Red light
- Star chart (printed or on tablet with red filter)
- Warm clothing
- Snacks and water
- Spares: batteries, lens caps, cleaning cloth
Keep this checklist taped to your telescope case. You’ll thank yourself later.
Why This Matters More Than You Think
Skip simulation, and you’ll likely spend your first session frustrated. You’ll see a blurry blob and think your telescope is broken. Or you’ll miss the best viewing window because you showed up too late. Or you’ll forget your eyepiece, and spend 45 minutes staring at nothing.
Simulate, and you’ll walk outside with a plan. You’ll know what you’re looking for. You’ll know how to find it. You’ll know when the best time is. And when you finally see Saturn’s rings for the first time-real, clear, and unmistakable-you’ll remember exactly how you got there.
This isn’t about being perfect. It’s about being ready. One well-planned session beats ten random ones.
Next Time: What to Do After Your First Session
After your simulated session turns into a real one, take notes. What did you see? What surprised you? What didn’t work? Did the mount wobble? Was the sky clearer than expected? That feedback becomes your next simulation plan.
Next month, try a different target. Maybe the Pleiades. Or the Andromeda Galaxy. Each time, you’ll get faster. Smarter. More confident. And soon, you won’t need the simulation anymore-you’ll just know.
Do I need expensive software to simulate an observation?
No. Free tools like Stellarium (desktop), SkySafari (mobile), and In-The-Sky.org (web) work perfectly for beginners. You don’t need a $100 app. Focus on learning how to use one tool well before upgrading.
Can I simulate observations from my apartment balcony?
Yes. Your location in the simulation should match your actual viewing spot. If you’re on a balcony with a view of the south, set your horizon line accordingly. Obstructions like trees or buildings show up in the app as blocked areas-use them to plan when your target will be visible.
How far in advance should I simulate my session?
At least 2-3 days ahead. This gives you time to check weather forecasts and adjust if needed. If you’re planning for a rare event like a planetary conjunction, simulate it a week in advance. You’ll want to know exactly when and where to look.
What if my telescope doesn’t match the simulation?
Most apps let you customize your equipment. Enter your telescope’s focal length and your eyepiece’s focal length. The app will calculate the magnification and field of view. If you’re unsure, start with a 25mm eyepiece-it’s the most common beginner choice and gives a wide, easy-to-find view.
Is it worth simulating if I only have binoculars?
Absolutely. Binoculars are great for wide-field views like the Milky Way, star clusters, and the Moon. Simulation helps you know where to point them. For example, you can find the Beehive Cluster in Cancer or the Double Cluster in Perseus with just 7x50 binoculars-if you know where to look.