27 Mar 2026
- 0 Comments
Why Your View Looks Soft Without Expensive Gear
Nothing kills a night under the stars faster than realizing your view is fuzzy. You point your scope at Jupiter, expecting bands on the gas giant, but everything looks hazy. Before you buy a $100 laser tool or a special sight tube, take a step back. Most serious alignment issues are visible with nothing more than your standard eyepiece and a dark sky. This approach relies on understanding how light travels through your optics.
We often overcomplicate maintenance because marketing convinces us we need specialized equipment for everything. But the fundamental physics of mirror alignment doesn’t change whether you have a high-tech device or just your eyes. Telescope Collimation is the process of aligning the optical components along a common axis to ensure light focuses precisely on the sensor or eye. It applies to reflectors primarily, as refractors are pre-aligned at the factory. If you have a Newtonian Reflector Dobsonian Telescope, the mirrors must speak the same language.
You might ask why you would even try this without tools. Cost is one factor, but access is another. If you are setting up outdoors far from home or traveling, carrying a heavy kit isn’t always practical. Knowing how to eyeball alignment empowers you to fix small shifts caused by transport bumps or thermal expansion. Let’s break down the specific visual cues you need to hunt for.
The Basics of Optical Axes
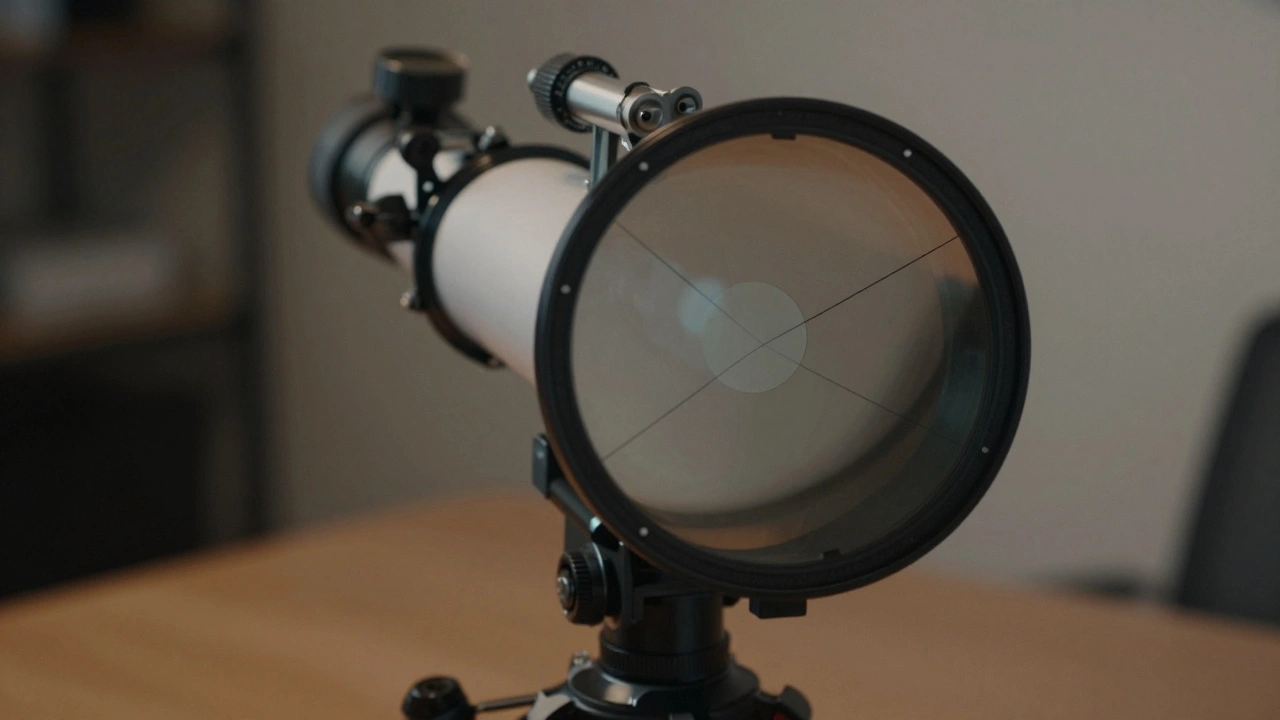
Before looking through the lens, you need to visualize the geometry inside the tube. Imagine a straight invisible rod running from the center of your primary mirror up to the center of your focuser. That is your optical axis. Now imagine the secondary mirror suspended directly in the middle of that path. Ideally, these three points are perfectly aligned.
When they are not, the light cone misses the sweet spot. This causes aberrations like coma or astigmatism. While you cannot adjust screws while looking down an eyepiece, you can definitely diagnose the problem state. A misaligned secondary mirror will cast an offset shadow. The spider vanes that hold the secondary should form a perfect cross behind the primary mirror reflection. If that cross looks skewed or lopsided, you have misalignment.
Indoor Visual Check: The Shadow Method
Setting up a telescope inside your house is safer for the delicate parts than rushing outside before dark. Turn off the lights. Remove the dust cap from the front of the tube. Place the telescope on a table so you can look down the open end of the tube without touching the glass.
Look at the primary mirror. You should see a faint reflection of the secondary mirror in the center of the large curved surface. If your secondary is round, the reflection should look like a perfect circle centered on the mirror. If it looks oval, the tilt of the secondary needs adjustment. You might also notice the support wires (spiders). They should cross directly in the middle of the primary mirror’s reflective surface.
| Visual Cue | Healthy State | Misaligned State |
|---|---|---|
| Secondary Shape | Perfect Circle | Elongated Oval |
| Spider Vanes | Symmetrical Cross | Off-Center Lines |
| Primary Reflection | Concentric Circles | Eccentric Offsets |
If you lack a flashlight, use ambient room light. Shine a lamp onto the side of the primary mirror. You want the reflection of your face or the window to be right in the center of the secondary mirror you see reflected there. It sounds recursive, but it works. The goal is symmetry. Symmetry means the light coming down is the same size as the light going up.
The Star Test: Your Ultimate Tool-Free Calibrator
This is where amateur astronomy becomes art. You need a stable night and a moderately bright star. Avoid Polaris if you are in the northern hemisphere; its altitude makes tracking difficult for testing. Choose something near the zenith or a slightly lower object like Vega. Capella is great in early evening during March and April nights.
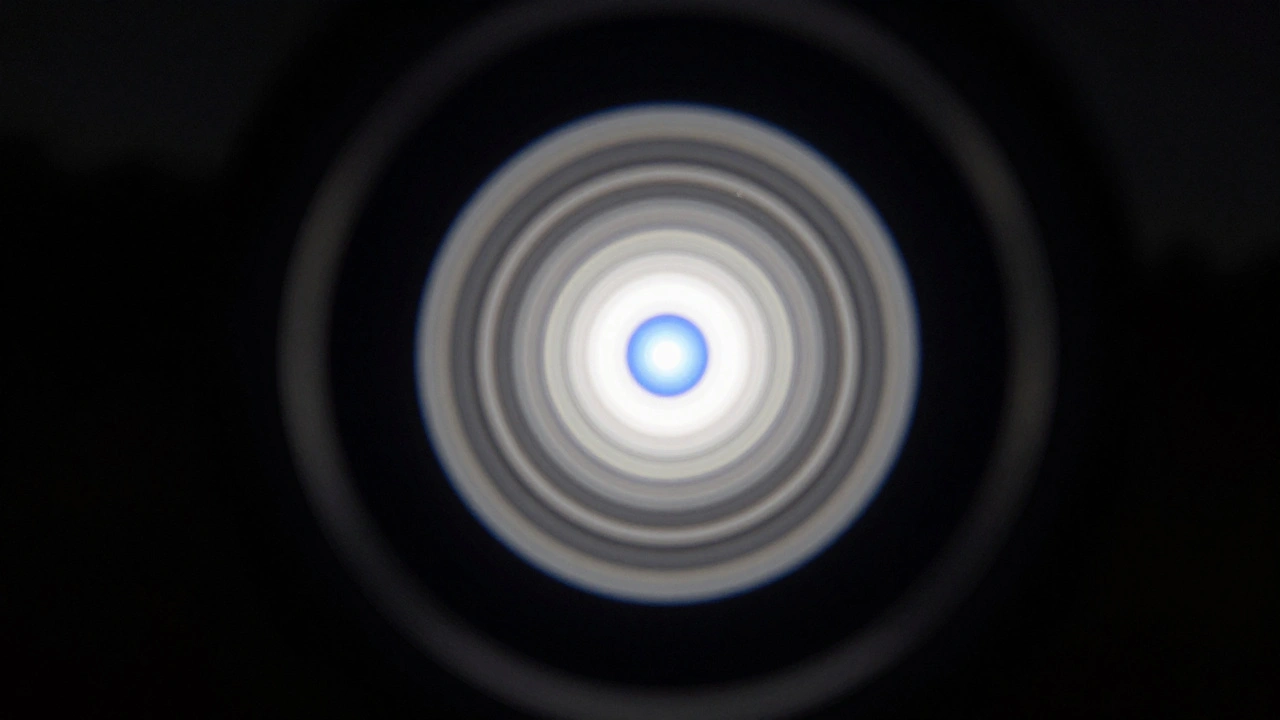
Star Test a technique where you defocus a bright star to inspect the diffraction pattern for symmetry is the gold standard for verification. Insert your highest powered eyepiece. Bring the star into sharp focus until it hits a pinpoint. Now, move the focuser slowly outward past the focal point. Watch the ring system that forms around the bright core.
These rings, known as diffraction rings, should be perfectly centered. As you push further out of focus, the inner and outer rings get wider. Crucially, the gap between them remains uniform on all sides. If the gap looks thicker on one side and thinner on the opposite side, your secondary mirror is tilted wrong.
Some might think you need a special Barlow lens for this, but any eyepiece works. Just remember to let your telescope cool down first. Heat rising from the tube creates air currents that mess with the image stability. Give your optics thirty minutes to equilibrate with the outside temperature before trusting what you see. A warm mirror acts like a heat shimmer, mimicking bad alignment.
Interpreting Diffraction Patterns
Understanding what you are looking at requires knowing the signs of failure. Coma is the most common error in cheap or poorly adjusted Newtonians. It makes the star look like a comet tail rather than a dot. If the "tail" points away from the center of the image, your primary mirror is likely tilted. Astigmatism shows the star turning into a short line or cross shape when focused.
Differentiate between focus error and collimation error. Rotate the focuser knob gently. If the rings rotate around the core as you move, the star is merely rotating due to atmospheric turbulence or mechanical wobble. Real optical errors stay fixed relative to the image regardless of minor movements. You need a steady hand, or a motorized tracker to help hold that star steady.
During March 2026, skyglow might be higher due to recent urban growth in many regions. Find a darker patch. Even slight light pollution reduces contrast, making faint outer diffraction rings harder to see. Do not fight glare. Close one eye completely. Squinting helps reduce peripheral distraction. The brain tends to auto-correct imperfect shapes, so forcing yourself to stare at the defect is necessary.
Troubleshooting Without Adjusting Yet
Identifying the problem is half the battle. Often people tighten screws when loosening them would help. Here is a quick decision tree for symptoms:
- Offset Center Markings: Look through the focuser. Are the markings on the secondary mirror dead center? If not, rotation is needed.
- Uneven Shadows: If the primary mirror reflection cuts off part of the secondary, the tilt is too severe.
- Fuzzy Center: The focus is correct, but the peak brightness isn’t sharp. This indicates axial error.
- Bright Corners: Light spillage suggests vignetting or extreme tilt blocking light cones.
Don’t touch the knobs yet. Take a photo or a mental snapshot of the state. Sometimes, tightening one bolt pulls the whole assembly sideways. Document the starting point so you can reverse changes if you make it worse.
When to Switch to Tools
There comes a limit where the naked eye lies. Precision work for planetary imaging requires sub-arcminute accuracy. Human vision has limits on judging concentricity. For visual-only use, ¼ inch is usually fine, but tight tolerance work demands lasers. We discuss the transition point here because knowing when to stop guessing saves time.
If you consistently see the same pattern despite multiple tweaks, your tools might be faulty. Or perhaps the secondary mirror mount itself is bent. Cheap tension nuts sometimes warp the metal. Replace the hardware before assuming your eyes are wrong. Visual checks are for calibration and gross error detection. Laser collimators handle the fine tuning for professional-grade results.
Regular checks should happen whenever you transport the scope. Vibrations on the road jar the delicate mirrors. Every six months, perform a full visual audit. Spring cleaning is a perfect time for this. The longer you wait, the more likely dust accumulates in those hard-to-reach corners, hiding alignment marks.
Maintenance Tips for Stability
Keep your environment consistent. Temperature swings inside the tube cause flexure. Store your telescope horizontally when not in use to relieve stress on the truss poles or mirror cell. If you live in a humid climate like the Pacific Northwest, condensation affects readings. Wipe down surfaces gently with lens tissue before checking. Moisture leaves oils that distort light differently than mechanical misalignment.
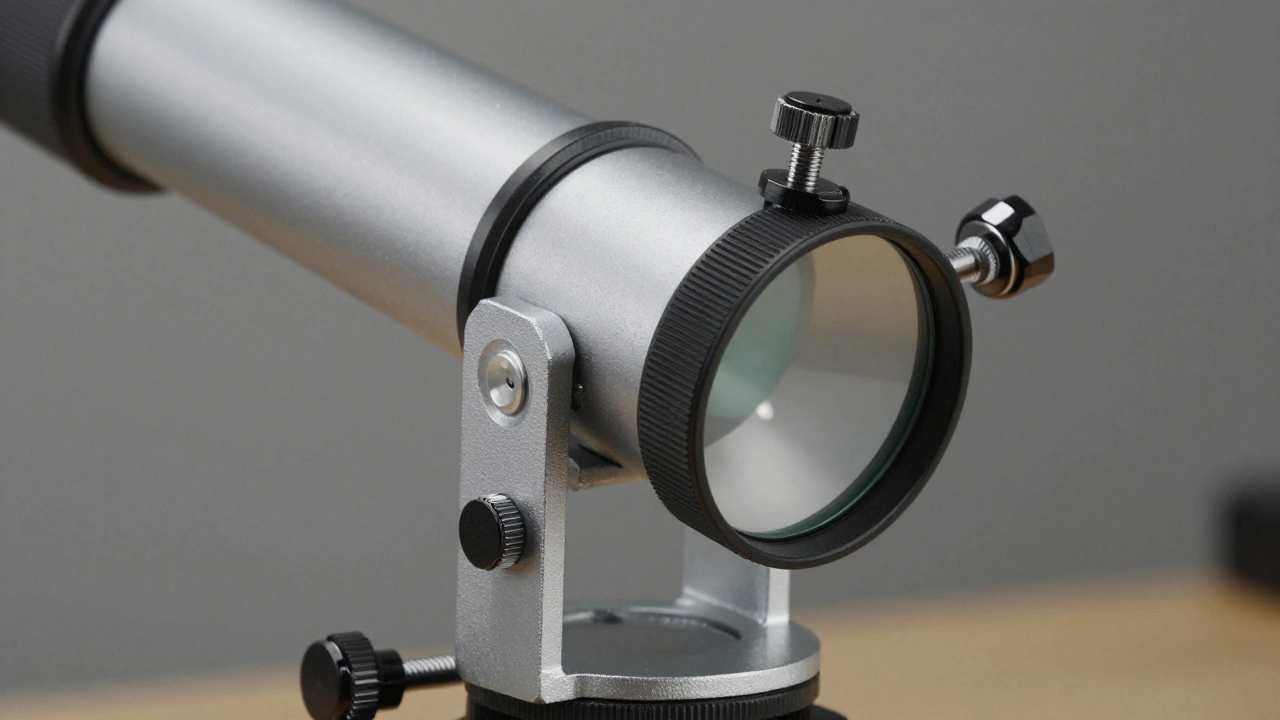
Avoid touching the mirrored surfaces. Fingerprints change reflectivity. Handle only by the edges of the secondary holder or the tube ends. Use rubber bands if the secondary mirror spins freely. Friction is your friend when preventing accidental movement during transport. Secure the focuser drawtube with tape after locking it down.
Can I collimate a refractor visually?
Generally no. Refractors use lenses that are permanently cemented or aligned at the factory. Attempting to adjust them without tools usually damages the seals. Stick to Newtonian reflectors for DIY alignment.
Is the moon good for testing?
The Moon is too bright and textured. The light overwhelms diffraction rings. Always use a point source star. Planets have extended discs that hide alignment flaws.
How often should I check alignment?
Check after every transport trip. Also, perform a routine check every three months to account for seasonal temperature changes affecting the mounting hardware.
Does power loss affect collimation?
Mechanical alignment does not depend on electronics. Only electric focusers or motors track motion. The optical geometry is purely physical, so power status does not change mirror position.
Why do my diffraction rings look elliptical?
Elliptical rings indicate the secondary mirror is tilted incorrectly. This happens frequently during shipping or moving. Adjust the tilt screws underneath the secondary mirror until rings become circular.