17 May 2026
- 0 Comments
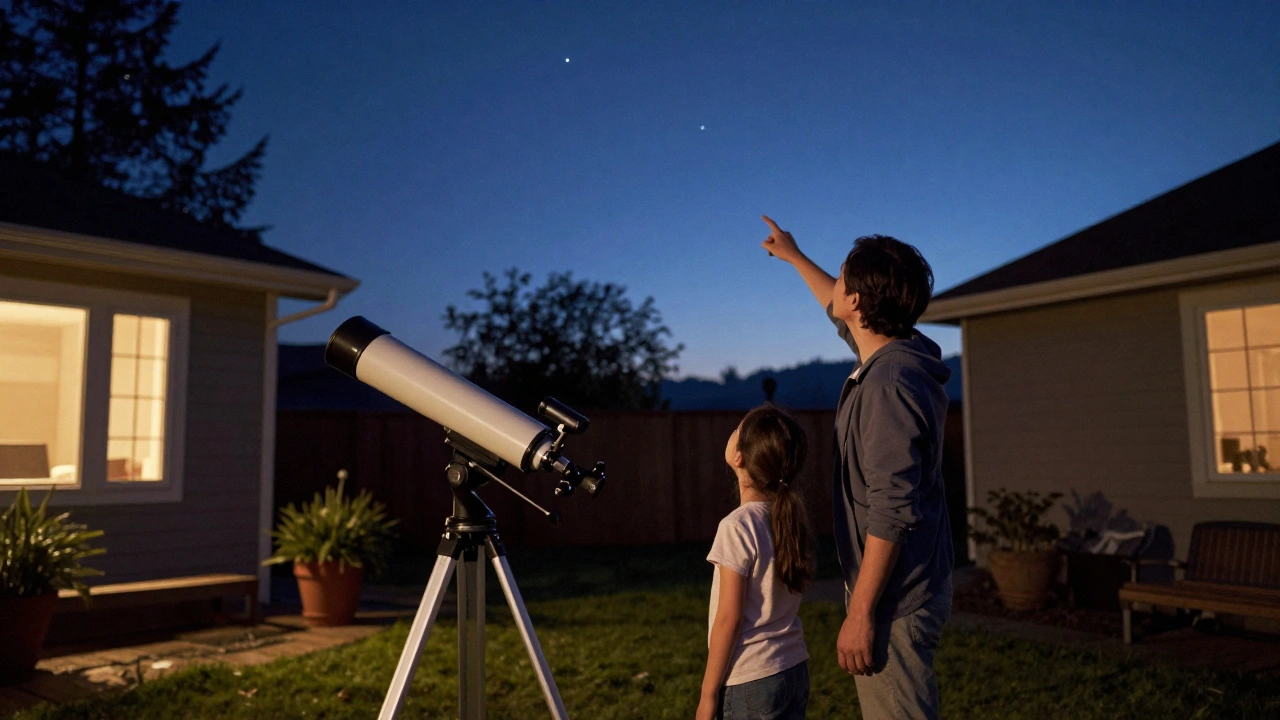
Imagine standing on a cool backyard patio in Portland, Oregon, looking up at the night sky. You point your telescope at a bright star, but when you look through the eyepiece, there’s nothing but darkness. Your child asks, "Where is it?" This moment is common for every beginner astronomer. The solution isn’t high-tech equipment; it’s a skill called star hopping.
Star hopping is the art of navigating the night sky by moving from one known celestial object to another, using familiar patterns as guideposts. Unlike modern telescopes with GoTo mounts that automatically find objects, star hopping teaches you to read the sky like a map. For parents and educators, this method transforms astronomy from a passive observation into an active adventure. It builds spatial reasoning, patience, and a deep connection to the cosmos.
Key Takeaways
- Star hopping uses bright, recognizable stars as stepping stones to locate fainter targets without electronic aids.
- Start with large, obvious constellations like the Big Dipper or Orion before attempting precise movements.
- Use red flashlights to preserve night vision and keep the experience comfortable for young eyes.
- Teach directional terms (north, south, east, west) relative to the horizon, not just cardinal directions.
- Patient repetition builds confidence; celebrate small victories like finding the Moon’s craters or Mars’ disk.
Why Star Hopping Matters for Young Astronomers
In an age where smartphones can identify any star instantly, why teach manual navigation? Because understanding how the sky works creates lasting knowledge. When a child learns to find Saturn by starting at Polaris and moving toward Cassiopeia, they aren’t just seeing a planet-they’re internalizing the structure of the celestial sphere. This process strengthens memory and observational skills far more than pressing a button ever could.
Moreover, star hopping removes dependency on technology. If batteries die or software glitches, the sky remains accessible. This resilience fosters independence and curiosity. Children who master this technique often develop a lifelong passion for astronomy, viewing the night sky not as a random scatter of lights, but as a coherent, navigable space.
From a developmental perspective, star hopping engages multiple cognitive domains. It requires visual-spatial processing, pattern recognition, and sequential thinking. These are foundational skills for STEM learning. By framing astronomy as a puzzle to solve, you make science tangible and exciting.
Setting Up for Success: Gear and Environment
You don’t need expensive gear to start star hopping. In fact, simpler equipment often works better for beginners. Here’s what you’ll need:
- A refractor or reflector telescope: A simple Dobsonian mount is ideal because it moves smoothly in two axes-up/down and left/right-making manual tracking intuitive.
- Low-power eyepieces: Start with 25mm or 32mm eyepieces. They provide a wide field of view, making it easier to spot reference stars and track movement.
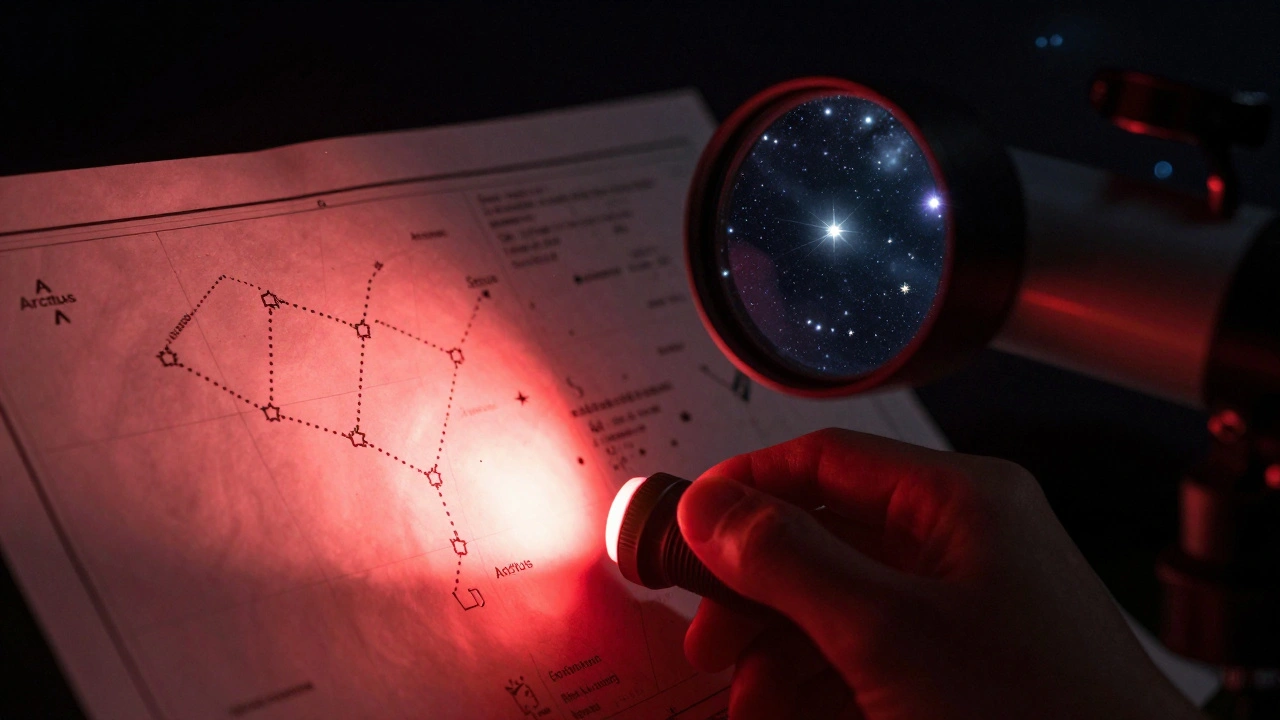
- A red flashlight: White light destroys night vision. Red light preserves it, allowing you to see charts and adjust settings without losing your ability to see faint stars.
- A star chart or planisphere: Paper maps are essential. Digital apps can help later, but paper forces engagement with the physical layout of the sky.
- Comfortable seating: Observing sessions last longer when everyone is comfortable. Bring blankets, chairs, and warm drinks.
Location matters too. Light pollution makes star hopping harder. If you live in a city, try visiting a dark-sky park or driving out of town. Even suburban backyards can work if you avoid streetlights and focus on brighter objects first.
The Core Technique: How to Star Hop
Star hopping relies on three principles: identification, estimation, and verification. Let’s break them down.
- Identify your starting point: Choose a bright, easily recognizable star or constellation. For example, the Big Dipper is visible across most northern latitudes year-round. Its handle points toward Arcturus, and its bowl points toward Spica.
- Estimate distances: Use your hand as a measuring tool. At arm’s length, your pinky finger spans about 1 degree, your fist covers 10 degrees, and your open hand spans roughly 20 degrees. Practice estimating these angles between stars.
- Move incrementally: Shift your telescope slowly in the direction indicated by your chart. Move only a few degrees at a time, checking the eyepiece after each adjustment. Look for new stars entering the field of view.
- Verify your position: Once you reach your target area, compare what you see with the star chart. Are the shapes matching? Is the brightness consistent? If not, backtrack slightly and try again.
This method feels slow at first, but speed comes with practice. After a few sessions, you’ll begin recognizing patterns instinctively. That’s when the magic happens-the sky stops being abstract and starts feeling familiar.
Teaching Directional Awareness
One of the biggest hurdles for children is understanding celestial directions. On Earth, we use north, south, east, and west based on fixed landmarks. In the sky, those references shift depending on where you stand and what time it is.
To simplify this, teach relative motion instead. Explain that stars rise in the east and set in the west due to Earth’s rotation. Show how constellations appear to move across the sky over hours. Use analogies: "Imagine the sky is a giant dome rotating above us. We’re watching it spin from below."
Practice identifying cardinal points using local landmarks. Point out which way is north using Polaris (the North Star). Then demonstrate how moving the telescope toward Polaris brings you closer to the celestial pole. Over time, children will associate specific parts of the sky with specific directions.
Choosing Beginner-Friendly Targets
Not all celestial objects are created equal for novice observers. Some require precision and dark skies; others shine brightly even in urban environments. Start with these easy wins:
| Target | Type | Visibility | Why It Works |
|---|---|---|---|
| Moon | Natural Satellite | Every clear night | Bright, detailed, always available |
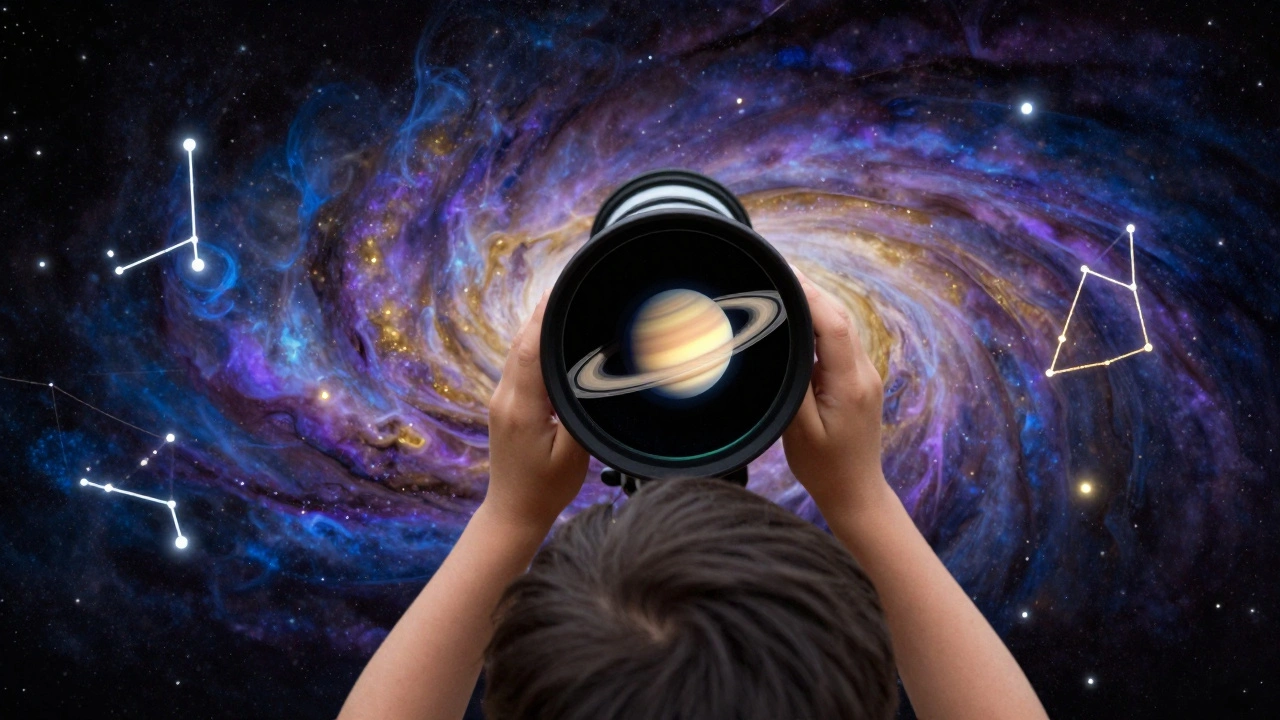
| Jupiter | Planet | Most nights | Large disk, visible moons |
| Saturn | Planet | Seasonal | Rings stand out clearly |
| Orion Nebula | Emission Nebula | Winter months | Fuzzy patch near Orion’s Belt |
| Andromeda Galaxy | Spiral Galaxy | Fall/Winter | Faint smudge reachable via Cassiopeia |
Avoid deep-sky objects like globular clusters or distant galaxies until your child has mastered basic navigation. These require darker skies and finer motor control. Focus on building confidence first.
Common Mistakes and How to Avoid Them
Even experienced astronomers stumble during star hopping. Here are frequent pitfalls and solutions:
- Moving too quickly: Rushing causes overshooting. Teach slow, deliberate adjustments. Count seconds between movements.
- Losing orientation: Without a reference point, it’s easy to get lost. Always note your last known star before shifting position.
- Ignoring atmospheric conditions: Poor seeing (turbulent air) blurs images. Wait for stable nights, especially for planetary views.
- Overcomplicating the path: Don’t attempt complex routes early on. Stick to straight lines between bright stars.
- Forgetting to let eyes adapt: Night vision takes 20-30 minutes to fully develop. Minimize exposure to white light.
If your child gets frustrated, pause and reset. Return to a known landmark, reorient, and try again. Patience is part of the lesson.
Turning Star Hopping Into a Game
Children learn best through play. Turn star hopping into a treasure hunt. Create a checklist of targets to find, award stickers for each success, or challenge them to beat their previous record for fastest hop.
Try "Constellation Connect": Draw imaginary lines between stars to form shapes. Ask your child to guess which mythological figure each represents. Or play "Guess the Object": Describe features without naming the object, then have them locate it using clues.
These games reinforce learning while keeping engagement high. They also encourage creativity and imagination-key components of scientific inquiry.
Building Long-Term Skills
As your child grows more confident, introduce advanced concepts gradually. Teach them to estimate magnitude differences between stars. Discuss why some stars twinkle more than others. Introduce the concept of right ascension and declination-not as math problems, but as coordinate systems similar to latitude and longitude.
Encourage journaling. Have them sketch what they see, noting date, time, location, and weather conditions. This habit develops scientific rigor and provides a personal archive of discoveries.
Eventually, transition from paper charts to digital tools. Apps like Stellarium or SkySafari can supplement traditional methods, offering real-time overlays and object identification. But always return to manual navigation periodically to maintain core skills.
When to Seek Help
If your child struggles despite repeated attempts, consider joining a local astronomy club. Many groups offer family-friendly events and mentorship programs. Experienced members can provide personalized guidance and share tips tailored to your region’s sky.
Online communities also serve as valuable resources. Forums dedicated to amateur astronomy often feature threads on teaching kids, complete with printable charts and activity ideas. Engaging with peers reduces isolation and expands your toolkit.
What age is appropriate for teaching star hopping?
Most children aged 7-12 can grasp basic star hopping concepts. Younger kids may enjoy simply pointing at stars and hearing stories, while older ones can handle directional estimation and chart reading. Adjust complexity based on attention span and interest level.
Can I star hop during the day?
No. Star hopping requires visibility of stars, which disappear under daylight. However, you can practice navigation skills using daytime constellations projected indoors or simulate scenarios with star projectors.
How do I know if my telescope is aligned correctly?
Align your finder scope with the main telescope during daytime by aiming both at a distant terrestrial object (like a tree branch). Adjust screws until they overlap perfectly. Repeat at night with a bright star to fine-tune alignment.
Is star hopping still relevant with GPS-enabled telescopes?
Absolutely. While automated systems save time, they don’t teach spatial awareness or deepen understanding of celestial mechanics. Star hopping builds foundational knowledge that enhances appreciation for technology rather than replacing it.
What should I do if my child loses interest halfway through?
Pause and reassess. Maybe the session was too long, the target too difficult, or the environment uncomfortable. Shorten future sessions, choose easier targets, or add interactive elements like storytelling or drawing. Reintroduce gently without pressure.
Do I need perfect dark skies to start?
Not initially. Bright planets and the Moon remain visible even in light-polluted areas. As skills improve, seek darker locations for deeper observations. Gradual progression prevents discouragement.
How often should we practice star hopping?
Weekly sessions work well for maintaining momentum. Consistency matters more than duration. Even 30-minute outings build familiarity faster than occasional marathon sessions.
Can I use binoculars instead of a telescope?
Yes! Binoculars are excellent training tools. Their wider fields of view make locating objects easier, helping beginners understand scale and relationships between stars before transitioning to higher magnification.
What’s the hardest part of star hopping for adults?
Impatience. Adults expect immediate results. Remember that mastery takes repetition. Embrace mistakes as learning opportunities and model calm persistence for your child.
Should I memorize constellations before teaching?
It helps significantly. Familiarity allows you to anticipate challenges and explain connections clearly. Study major seasonal patterns beforehand so you can guide confidently without constant chart-checking.
Next Steps: Expanding Your Cosmic Journey
Once your child masters basic star hopping, explore related activities. Try lunar crater mapping, track meteor showers, or observe Jupiter’s Galilean moons over several nights. Each experience reinforces navigation skills while introducing new astronomical phenomena.
Consider participating in citizen science projects like Globe at Night, where families contribute data on light pollution levels. This connects personal observation to global research, showing how individual efforts matter.
Finally, document progress. Keep a shared journal filled with sketches, notes, and photos. Reflect on growth together. Celebrate milestones-not just successful hops, but moments of wonder, questions asked, and curiosity sparked.
The sky doesn’t change much from year to year, yet our perception does. With each session, your child gains not just knowledge, but perspective. And that’s worth every cold night spent staring upward.