16 Apr 2026
- 0 Comments
Ever spent an hour in a simulator, found a perfect, dim galaxy, and then stepped outside only to realize you have no idea where to point your telescope? It's a common frustration. Digital maps make the universe look like a clickable menu, but the real sky is a messy, dark expanse where light pollution and trees get in the way. The trick isn't just knowing where a star is on a screen, but translating that 2D coordinate into a physical movement in your backyard.
Quick Wins for Your First Outing
- Start with Bright Anchors: Don't go straight for a nebula. Find a bright "anchor" star first.
- Check the Horizon: Your simulator doesn't show the neighbor's oak tree or the glow of the city center.
- Time the Transit: Objects are easiest to see when they are at their highest point in the sky.
- Sync Your Clock: Ensure your software and your actual watch are perfectly aligned.
The Digital Blueprint
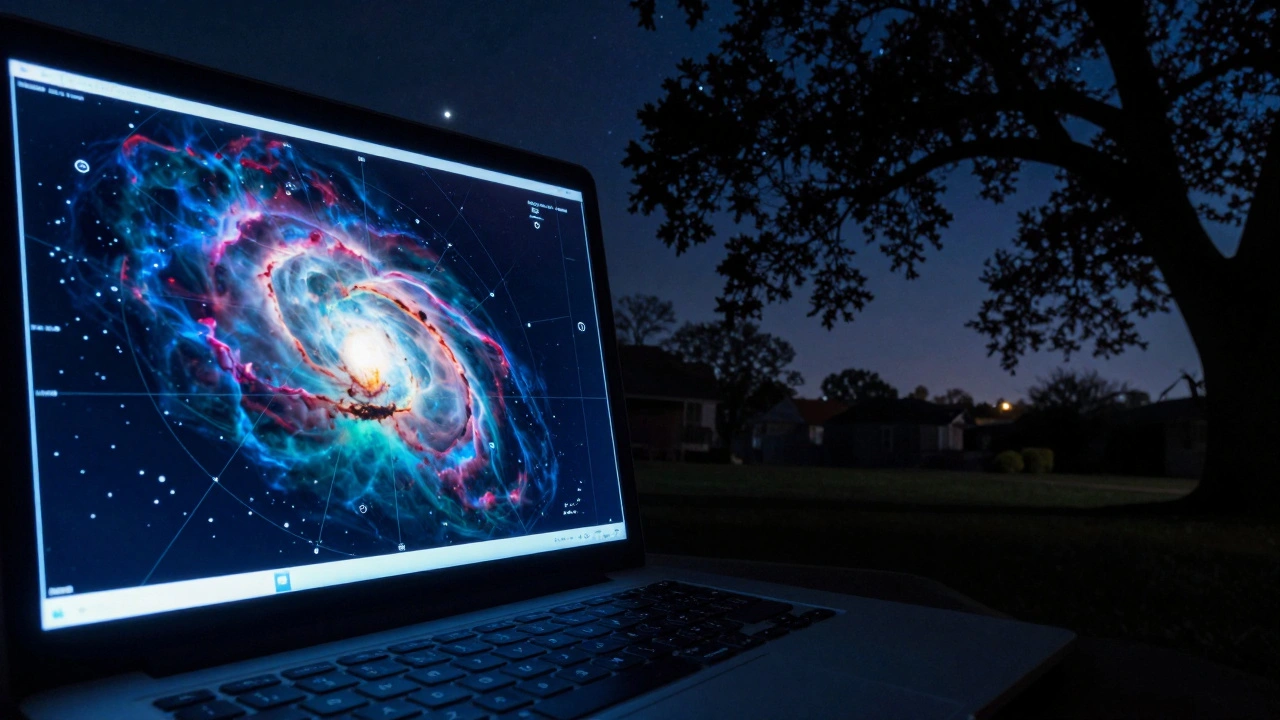
Before you lug a heavy tripod across the lawn, you need a map. Stellarium is a free, open-source planetarium software that shows a realistic 3D map of the stars, planets, and constellations. It is the gold standard for preparing an observing session because it allows you to simulate exactly what you will see based on your specific GPS coordinates. astronomy simulators like this aren't just for gazing; they are training tools.
When you're in the software, don't just look at the object. Look at the space around it. Use the "star hopping" method digitally. Find a bright, unmistakable star-say, Sirius-and trace a path from there to your target. If you only memorize the target's position, you'll be lost the moment a cloud drifts by. By mapping a route, you create a mental breadcrumb trail.
Dealing with the "Reality Gap"
The biggest shock when moving from a screen to the sky is the light. In a simulator, the background is a perfect, velvet black. In reality, you're dealing with Light Pollution is the brightening of the night sky caused by artificial light, which obscures celestial objects. This creates a "contrast gap." A galaxy that looks obvious in a simulator might be completely invisible to your eye if you're under a suburban streetlamp.
To fix this, use the software's atmospheric settings. Most high-end simulators let you adjust the "Bortle Scale," which is a numeric scale from 1 (pristine dark sky) to 9 (inner city). If you live in a city, set your simulator to Bortle 7 or 8. This will hide the faint stars that you'll never actually see, preventing you from spending two hours searching for a ghost.
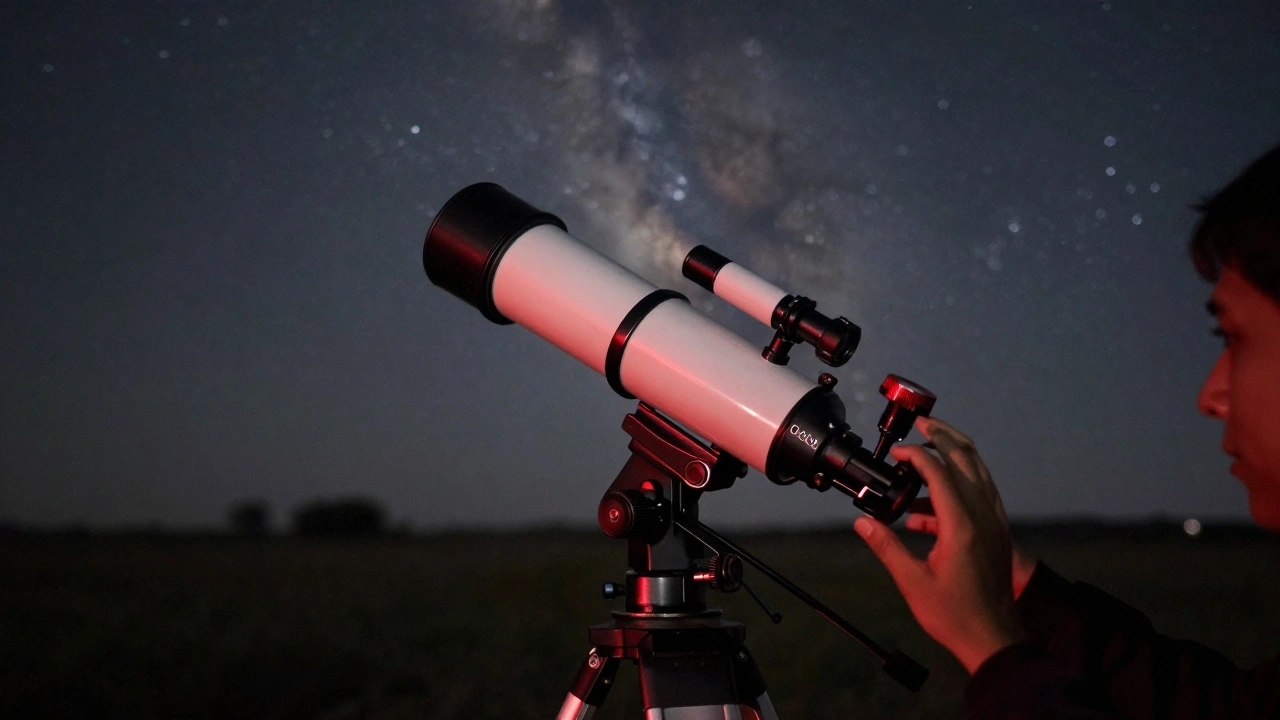
The Hardware Handshake
Now comes the physical part. Whether you have a manual Dobsonian or a computerized rig, you need a way to tell the telescope where "North" is. For those using a GoTo Telescope is a motorized telescope mount that can automatically slew to a database of celestial objects. The transition is easier, but the alignment must be precise. A common mistake is a sloppy "Two-Star Alignment." If your initial alignment stars are too close together in the sky, the telescope's internal map will be slightly skewed, and your targets will be off-center.
| Feature | Stellarium | SkySafari | Cartes du Ciel |
|---|---|---|---|
| Platform | Desktop/Mobile | Mobile/Tablet | Desktop |
| Telescope Control | Basic/Plugin | Advanced | Highly Technical |
| Realism | Very High | High | Moderate |
| Best For | Visual Planning | Field Use | Deep Sky Mapping |
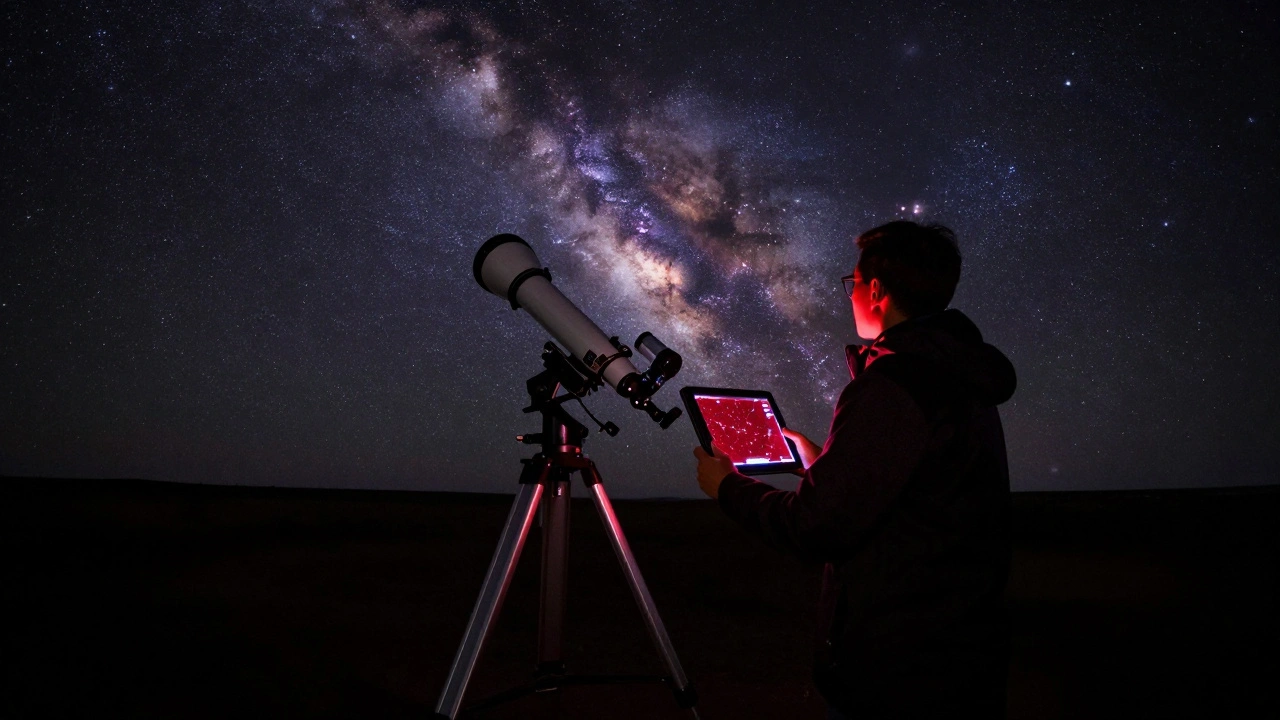
Mastering the Star Hop
If you're using a manual telescope, you're essentially doing a puzzle. You start with a Finder Scope is a small, low-magnification telescope mounted on top of a larger one to help center objects. The finder scope is your primary tool for translating the simulator's map to reality. It has a wider field of view, meaning you can see more of the surrounding constellation.
Here is the workflow: find your anchor star in the finder scope, move to the next slightly dimmer star you identified in your simulator, and repeat until you hit the target. If you find yourself staring at a blank patch of sky for more than five minutes, go back to your anchor and restart. The sky rotates, and if you've been off by just a few degrees, the target will have drifted out of your field of view.
Avoiding Common Pitfalls
One of the most frustrating moments is when you find the object, but it looks like a "fuzzy grey smudge." This is because simulators often show you a processed image from a telescope like Hubble Space Telescope is a large space-based observatory that provides high-resolution images of deep space. The real eye cannot see colors in deep-sky objects because our rods (the light-sensing cells in our eyes) aren't sensitive enough to detect color in low light. Don't expect the neon pinks of a nebula; expect a subtle, ghostly glow.
Another trap is ignoring the Moon Phase is the amount of the Moon's surface that is illuminated by the Sun as seen from Earth. A full moon is essentially a giant lightbulb in the sky. It washes out the very galaxies and nebulae you spent all afternoon planning for in your simulator. Always check the lunar calendar. If the moon is more than 50% illuminated, stick to planets and double stars.
The Final Checklist
- Simulate the view: Set your location and time in the software.
- Identify the "Anchor": Pick a magnitude 1 or 2 star near your target.
- Trace the Path: Note the distance and direction between stars.
- Verify the Horizon: Ensure the object is at least 30 degrees above the horizon to avoid "atmospheric extinction" (where the air is too thick and blurry).
- Dark Adaptation: Once outside, give your eyes 20 minutes to adjust. If you look at your bright phone screen to check the simulator, you'll reset your night vision and lose the target again. Use a red-light filter.
Why does the object look different in the simulator than in my telescope?
Simulators often use integrated photos or high-contrast renderings. In reality, you are seeing raw photons. Your eye's limited light-gathering power and the presence of light pollution make objects appear as grey or white smudges rather than colorful clouds.
How do I use a simulator to find things if I don't have a GoTo mount?
Use the "Star Hopping" technique. Find a very bright star in the simulator, then identify a sequence of smaller stars that lead to your target. Memorize this path or sketch it on a piece of paper before heading outside.
Can I use these apps while I am actually observing?
Yes, but only if you use "Night Mode" (red screen). The bright white light from a smartphone will destroy your rhodopsin levels, which are essential for seeing faint objects. It takes about 20-30 minutes for your eyes to fully recover after a flash of white light.
What is the best time of night to observe a specific object?
The best time is when the object is at its "meridian transit," meaning it is at its highest point in the sky for your location. This minimizes the amount of atmosphere you have to look through, resulting in a sharper, clearer image.
Do I need a high-end computer to run astronomy simulators?
Not at all. Programs like Stellarium run on basic laptops and even tablets. The most important factor is that you have the correct location and time settings enabled to match your actual environment.
Next Steps for Your Journey
Once you've mastered the jump from screen to sky, try "inverted planning." Go outside, find something you can't identify, and then use your simulator to figure out what it was. This builds a deeper intuition for the scale of the sky. If you're still struggling with alignment, consider a laser pointer (only for pointing, never for shining into the sky) to mark your paths. As you get more comfortable, start exploring the "Messier Objects"-a list of the most famous deep-sky targets that are perfect for testing your transition skills.