17 Aug 2026
- 0 Comments
It’s a crisp October night in the Pacific Northwest. The sky is pitch black, not a cloud in sight, and the stars are sharp as diamonds. You set up your telescope, excited to see the rings of Saturn or the faint spiral arms of M31. But when you look through the eyepiece, everything looks like it’s swimming in oil. The details are gone, replaced by a shimmering blur that makes your eyes ache. This is the frustrating reality for many amateur astronomers: transparency does not equal seeing. While both are critical for a great observing session, they measure two completely different aspects of the atmosphere.
Understanding the difference between these two factors is the key to predicting whether tonight will be a session of breathtaking detail or one of frustrating blurriness. If you’ve ever wondered why some clear nights yield incredible views while others leave you staring at fuzzy blobs, the answer lies in how the air itself behaves.
Defining the Core Concepts: Transparency vs. Seeing
To grasp why clear skies don’t always mean good viewing, we first need to define what each term actually measures. They are distinct atmospheric properties that affect light differently as it travels from space to your eye.
Transparency is a measure of how much starlight reaches the ground without being scattered or absorbed by the atmosphere. It depends on humidity, dust, pollution, and water vapor. High transparency means you can see faint objects, distant galaxies, and subtle nebulae. Low transparency washes out dim details, making the sky appear milky or hazy even if there are no clouds.
Seeing is a measure of atmospheric stability, specifically how steady the air is. It refers to the turbulence in the atmosphere caused by temperature differences. When air masses of different temperatures mix, they refract light at different rates, causing stars to twinkle and planetary images to jitter. Excellent seeing means the air is stable, providing a sharp, steady image. Poor seeing causes the image to dance, boil, or break apart.
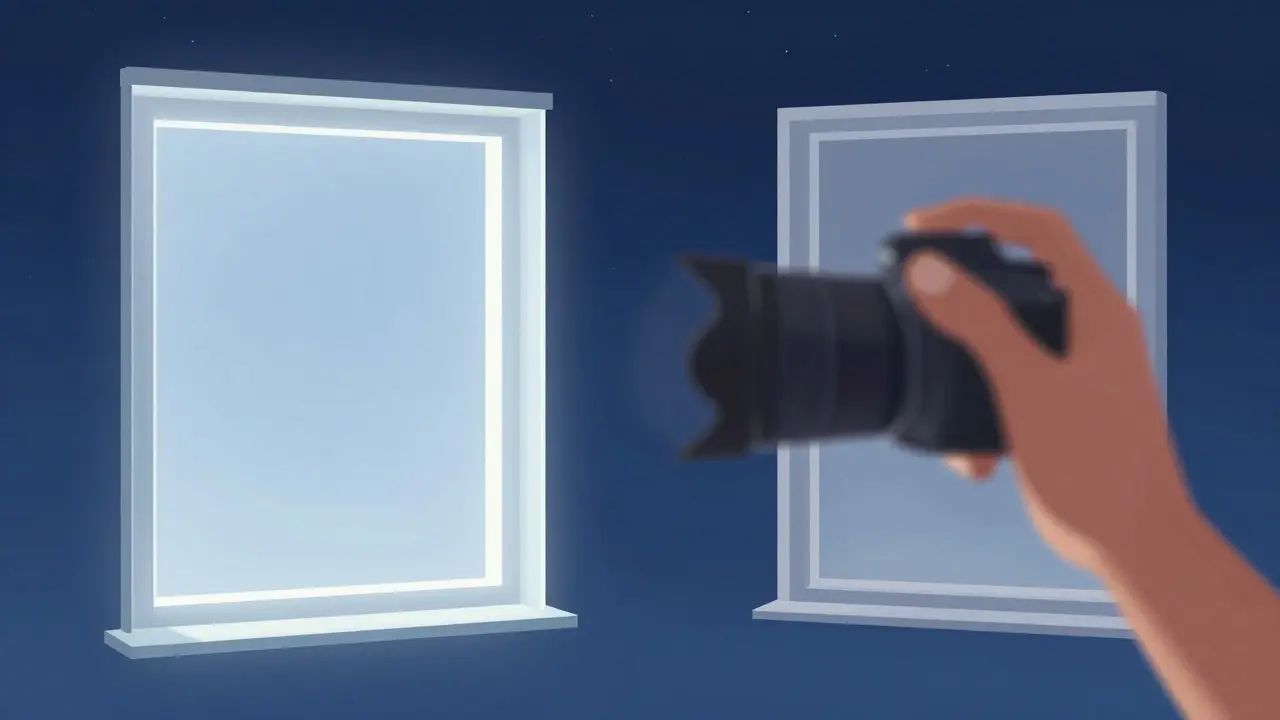
Think of it this way: Transparency is about how *clear* the window is, while Seeing is about how *steady* the hand holding the camera is. You can have a perfectly clean window (high transparency) but a shaky hand (poor seeing), resulting in a blurry photo. Conversely, you might have a very steady hand (excellent seeing) but a dirty, foggy window (low transparency), limiting how far you can see.
The Physics of Atmospheric Turbulence
Why does seeing change so dramatically from night to night? The culprit is thermal convection. During the day, the sun heats the ground unevenly. As the sun sets, the ground cools, but it doesn’t do so uniformly. Patches of warm air rise, meeting cooler air above. This creates eddies and vortices-tiny whirlpools of air with varying densities.
Light passing through these turbulent cells bends slightly more or less depending on the density of the air it traverses. For a point source like a star, this results in twinkling. For an extended object like a planet, the entire image shifts and distorts. The higher the magnification you use, the more sensitive you become to these distortions. At low power, poor seeing might just make the Moon look wobbly. At high power, it can turn Jupiter into a smudge.
This phenomenon is quantified by the Full Width Half Maximum (FWHM) metric, which measures the angular size of a star's image due to atmospheric blur. In professional astronomy, excellent seeing is often defined as a FWHM of less than 0.5 arcseconds. For amateur observers, "good" seeing typically allows for stable planetary detail at 200x-300x magnification, while "poor" seeing limits useful magnification to under 100x.
How Weather Patterns Dictate Observing Quality
You don’t need a weather station to predict seeing; you just need to understand basic meteorology. The type of front moving through your area plays a huge role.
- Cold Fronts: These usually bring the best seeing. A cold front pushes out warm, moist air and replaces it with dense, cool, dry air. Because the air is stable and stratified, turbulence is minimized. However, cold fronts can also bring high winds, which can stir up dust and reduce transparency temporarily.
- High Pressure Systems: These are the gold standard for visual astronomy. High pressure brings sinking air, which suppresses vertical motion and turbulence. The result is often crystal-clear, steady air. This is why the best observing seasons in mid-latitudes are late summer and early autumn, when high-pressure systems are common and the nights are long.
- Warm Fronts: These tend to bring gradual cloud cover and increased humidity. While transparency may drop before the rain arrives, seeing can sometimes be surprisingly good if the air remains calm. However, the combination of moisture and warmth often leads to unstable layers near the ground.
In regions like Portland, Oregon, the marine layer can significantly impact both transparency and seeing. When the ocean breeze blows inland, it brings moisture that reduces transparency. If this moist air meets warmer land air, it can create a stable inversion layer, which actually improves seeing by capping the turbulence below it. This is why coastal areas often have better seeing than inland valleys, despite lower transparency.
Practical Tips for Assessing Conditions Before You Go Out
Before you load your car with gear, take a few minutes to assess the local conditions. You can gauge both transparency and seeing using simple techniques.
- Check the Wind: Light winds (under 5 mph) generally indicate stable air and good seeing. Strong or gusty winds suggest turbulence and poor seeing. Look at the movement of tree leaves or flags; if they are swaying wildly, expect boiling images.
- Observe Star Twinkling: Find a bright star like Sirius or Vega. If it twinkles intensely and rapidly, seeing is likely poor. If it shines steadily with minimal variation, seeing is good. Remember, stars near the horizon twinkle more due to passing through more atmosphere, so check stars near the zenith for the most accurate assessment.
- Test Transparency with a Dim Object: Use a binocular or low-power telescope to look at a known dim object, such as the Pleiades cluster or the Andromeda Galaxy (if visible). If you can see faint stars in the Pleiades or the outer haze of Andromeda, transparency is high. If only the brightest stars are visible, transparency is low.
- Use the Bortle Scale: The Bortle Dark-Sky Scale is a nine-point scale that classifies the darkness of the night sky based on surface brightness. Class 1-2 skies offer exceptional transparency, while Class 8-9 urban skies severely limit deep-sky observing regardless of seeing conditions.
A quick rule of thumb: If the air feels still and cool, and stars shine steadily, prioritize high-magnification planetary observing. If the air feels humid or windy, but the sky is dark, stick to low-magnification wide-field views where seeing matters less.
Optimizing Your Setup for Varying Conditions
Your equipment choice should adapt to the prevailing atmospheric conditions. Using the wrong setup for the night wastes time and frustrates the observer.
| Condition | Transparency | Seeing | Best Targets | Magnification Strategy |
|---|---|---|---|---|
| Ideal Night | High | Excellent | Planets, Double Stars, Small Nebulae | High (200x+) |
| Stable but Hazy | Low | Good | Bright Planets, Large Open Clusters | Medium (100x-150x) |
| Turbulent but Clear | High | Poor | Lunar Surface, Wide-Field Galaxies | Low (50x-80x) |
| Bad Night | Low | Poor | Brightest Constellations, Naked Eye Objects | Very Low (Naked Eye or Binoculars) |
When seeing is poor, resist the urge to crank up the magnification. Higher magnification reveals the turbulence, not the object. Instead, use lower power to let the larger field of view average out the fluctuations. This technique, known as "defocusing," can also help stabilize the image by blurring the fine details that are being distorted by the air.
For transparency-limited nights, focus on bright, compact objects. The Moon, planets, and large double clusters remain visible even when faint nebulosity disappears. Use averted vision to detect dimmer features, looking slightly to the side of the target to engage the more light-sensitive rod cells in your retina.
Common Misconceptions About Clear Skies
Many beginners assume that a cloudless sky guarantees a perfect session. This misconception leads to disappointment when the expected detail fails to materialize. Here are a few myths to debunk:
- "No Clouds Means Good Seeing": False. Clouds block light, but turbulence exists independently of cloud cover. A clear, windy night often has worse seeing than a partly cloudy, calm night.
- "Colder Air Always Means Better Seeing": Mostly true, but not absolute. Cold air is denser and less prone to convection, but if the ground is still radiating heat, localized turbulence can persist. The key is *stability*, not just temperature.
- "Humidity Doesn't Matter if There Are No Clouds": Incorrect. Water vapor scatters blue light and absorbs infrared, reducing contrast and transparency. Even invisible humidity degrades the quality of the image, especially for faint deep-sky objects.
Learning to read the atmosphere is a skill that improves with experience. Over time, you’ll develop an intuition for what the air feels like and how it will affect your view. Pay attention to the sound of the wind, the feel of the air on your skin, and the behavior of nearby trees. These sensory cues provide immediate feedback that forecasts often miss.
Frequently Asked Questions
What is the best time of day for good seeing?
Late evening to midnight is often the best time. By then, the ground has cooled sufficiently to minimize thermal convection from the day’s heating. Early morning hours can also offer excellent seeing, as the atmosphere has settled further overnight. Avoid observing immediately after sunset, as residual heat from the ground often causes poor seeing.
Does altitude affect seeing and transparency?
Yes, significantly. Higher altitudes place you above a larger portion of the turbulent boundary layer near the ground, improving seeing. They also reduce the amount of atmosphere your light must pass through, increasing transparency. This is why major observatories are built on mountaintops, such as Mauna Kea or the Atacama Desert sites.
Can I improve seeing with my telescope setup?
Not directly, but you can mitigate its effects. Ensure your telescope is properly collimated and aligned. Use a sturdy tripod to minimize vibration. Consider using a shorter focal length telescope for poor seeing nights, as it provides lower magnification and a brighter image. Some advanced observers use adaptive optics, but this is rare for amateur setups.
How does light pollution interact with transparency?
Light pollution acts as artificial transparency loss. Even on a clear night, city glow raises the background brightness of the sky, washing out faint objects. This effect is independent of natural transparency but compounds it. To maximize visibility, observe away from light sources or use light-pollution filters designed for specific wavelengths.
Is seeing consistent across a single night?
No, seeing can change rapidly within an hour. Winds shift, temperature gradients evolve, and jet stream activity varies. It’s common to start a session with poor seeing and end with excellent conditions, or vice versa. Always re-evaluate conditions every 30-60 minutes and adjust your targets and magnification accordingly.