17 Aug 2026
- 0 Comments
Staring at the Moon through a cheap binocular or a high-end Dobsonian, you might wonder why some nights reveal crisp craters while others show a blurry gray blob. The answer usually isn't your eyes-it's the magnification. Getting this number right is the difference between seeing a flat disk and exploring the rugged terrain of Tycho or Copernicus.
Many new observers make the mistake of reaching for the highest power eyepiece immediately. But higher isn't always better. If the atmosphere is unstable (bad "seeing"), high magnification just amplifies the shimmering heat haze. This guide breaks down exactly how to choose the right power for what you want to see, from the full lunar face to specific geological features.
Understanding the Relationship Between Aperture and Magnification
Before picking an eyepiece, you need to understand the hard limits of your equipment. There are two primary rules of thumb that govern visual astronomy:
- The Rule of Thumb for Maximum Useful Magnification: This is typically calculated as twice the aperture of your telescope in millimeters. For example, if you have a 100mm refractor, your maximum useful magnification is roughly 200x. Pushing beyond this often results in a dim, empty image because the light-gathering power cannot support the enlarged view.
- The Minimum Practical Magnification: This is generally one millimeter per inch of aperture. A 4-inch (100mm) scope has a minimum practical magnification of about 25x. Going lower than this underutilizes the scope's light-gathering ability and may not fill your field of view adequately.
These numbers aren't arbitrary; they stem from the physics of diffraction and atmospheric turbulence. When you exceed the maximum useful magnification, you are essentially enlarging noise rather than detail. Conversely, using too low a magnification on a large scope means you're wasting potential resolution.
Whole Disk Views: Setting the Baseline
To appreciate the Moon's phases, terminator effects, and overall topography, you need a wide field of view. This is where low to medium magnification shines.
| Viewing Goal | Magnification Range | Ideal Eyepiece (for 100mm Scope) | Key Features Visible |
|---|---|---|---|
| Full Moon / Phase Tracking | 20x - 40x | 25mm - 13mm | Entire disk, maria contrast, limb darkening |
| Terminator Shadows | 50x - 80x | 10mm - 6.5mm | Mountain shadows, rilles, ray systems |
| Specific Craters | 100x - 150x | 5mm - 3.5mm | Central peaks, crater walls, ejecta blankets |
| Extreme Detail (Good Seeing) | 150x - 200x | 3.5mm - 2.5mm | Small secondary craters, surface texture |
At 20x to 40x, the Moon fits comfortably in the field of view of most standard telescopes. This range is perfect for sketching or taking in the grand scale of the lunar maria. You can clearly distinguish the dark basaltic plains from the lighter highlands without losing context. If you are using a small telescope, like a 70mm or 80mm refractor, staying under 50x is crucial for maintaining a bright, stable image.
Zooming In: The Terminator Advantage
The best time to observe lunar detail isn't during a full moon. It's when the Moon is half-lit, near the first or last quarter. At this phase, the Terminator is the line separating the illuminated portion of the Moon from the dark portion. As sunlight hits the mountains and craters at a low angle, long shadows are cast, creating three-dimensional relief that is invisible during full illumination.
For this type of observation, bump your magnification to 50x-80x. At this level, you start to see the intricate network of rilles-long, narrow depressions that look like dried riverbeds. You can trace the rays from bright craters like Tycho across the surface. The key here is stability. If the air is turbulent, drop back to 50x. A slightly less detailed but steady image is far more rewarding than a high-power view that dances around like water in a washing machine.
Crater Close-Ups: Pushing the Limits
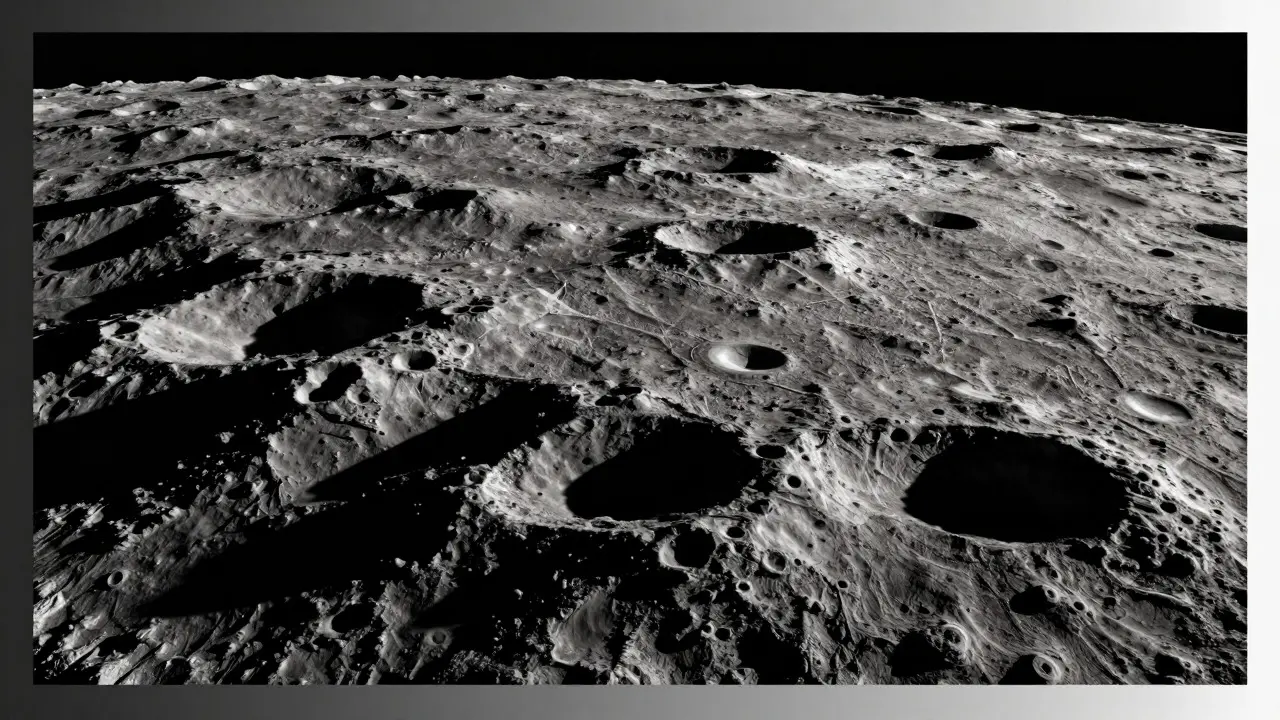
When you want to examine specific features, such as the central peak of Copernicus or the jagged rim of Kepler, you need higher magnification. This is where the quality of your optics matters most.
If you have a larger aperture, say a 150mm or 200mm reflector, you have more room to work with. A 200mm Dobsonian can handle up to 400x theoretically, but practically, 200x-250x is the sweet spot for most nights in Portland, Oregon, where marine layer and humidity can degrade seeing conditions quickly.
- Select Your Target: Choose a prominent crater near the terminator. Copernicus, Tycho, and Kepler are excellent starting points due to their brightness and distinct features.
- Start Low, Go High: Begin at 100x to center the target. Then, swap to a shorter focal length eyepiece to increase magnification.
- Check Stability: Look at the edge of the Moon. If it looks fuzzy or wavy, your seeing is poor. Drop the magnification until the edges sharpen.
- Observe Details: At 150x+, you should be able to see the internal structures of large craters. Look for terracing on the inner walls and the height of central peaks relative to the surrounding floor.
A pro tip: Use a Barlow lens sparingly. While it doubles the magnification, it also reduces the exit pupil and makes focusing harder. Often, simply swapping to a shorter native eyepiece yields a cleaner image because it introduces less glass into the optical path.
Atmospheric Seeing: The Hidden Variable
Your telescope's specs don't account for the Earth's atmosphere. "Seeing" refers to the clarity and steadiness of the air above you. On a clear night in the desert, you might achieve sharp images at 300x. In Portland, with its frequent overcast and humidity, 150x might be the ceiling on a good night.
How do you test your seeing? Look at a bright star through your telescope. If the star remains a pinpoint, your seeing is excellent. If it blurs into a fuzzy ball, your seeing is mediocre. If it disappears entirely into a halo, your seeing is poor. Always match your magnification to the current atmospheric conditions, not just the capabilities of your gear.
Common Pitfalls and How to Avoid Them
Even experienced observers fall into these traps:
- Over-Magnifying on Bad Nights: Chasing details that aren't there leads to frustration. If the image is soft, lower the power. Sometimes, a lower magnification reveals more detail because the eye can resolve the contrast better.
- Ignoring Eye Relief: High-magnification eyepieces often have short eye relief. If you wear glasses, you might struggle to see the full field of view. Consider removing your glasses if your prescription is mild, or use eyepieces designed for longer eye relief.
- Thermal Equilibration: Telescopes need time to cool to ambient temperature. If you set up your scope indoors and bring it outside, internal air currents will distort your image. Let your telescope sit outside for at least 30 minutes before observing.
Frequently Asked Questions
What is the best magnification to see the Moon's craters?
For general crater viewing, 50x to 100x is ideal. To see fine details within craters, such as central peaks or wall terracing, you need 100x to 150x, provided your atmospheric seeing is stable. Always start lower and increase only if the image remains sharp.
Can I use any magnification with my telescope?
No. Your telescope has a maximum useful magnification determined by its aperture (usually 2x the aperture in mm). Exceeding this limit results in a dim, blurry image. Similarly, going below the minimum practical magnification (1x the aperture in inches) wastes the scope's potential and may result in a tiny image in the field of view.
Why does the Moon look blurry at high magnification?
Blurry images at high magnification are usually caused by poor atmospheric seeing (turbulent air) or incorrect focus. It can also happen if you are exceeding the maximum useful magnification of your telescope. Try lowering the magnification and refocusing carefully.
Is a Barlow lens worth it for lunar observing?
A Barlow lens can be useful for getting intermediate magnifications without buying additional eyepieces. However, it adds extra glass, which can reduce contrast and make focusing more difficult. For critical lunar detail, a high-quality native eyepiece is often superior to a Barlow-enhanced one.
What eyepiece should I buy first for Moon watching?
Start with a mid-range eyepiece that provides 50x to 80x magnification for your specific telescope. This range offers a balance between field of view and detail, making it versatile for both whole-disk views and moderate close-ups of major craters.